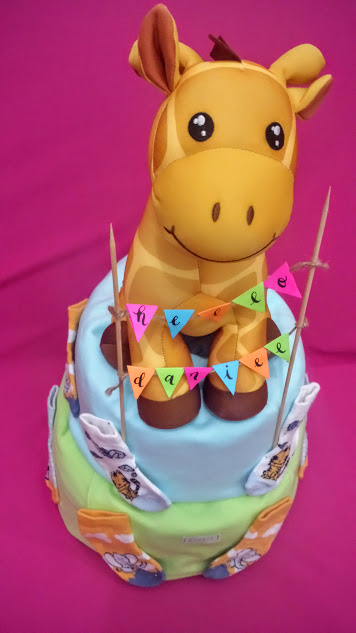
First Nappy Cake!

I can't remember the first time I saw a diaper / nappy cake but I do remember the time when I found out that an office mate of mine actually does it. I always wanted to make one but there isn't a chance for me to do so. Obviously since it's already a part time job of hers in a way, there's no way others would request me for it. There were some parties I've been to but laziness always gets me so I always end up buying clothes or toys instead.
My moment came when I found out we're going to do a baby shower for a neighbor. I started to buy stuff I would need ASAP so that I have no reasons of putting it off for another party.
The baby shower we were planning is for a baby boy so obviously all pinks are out. I thought blue and green would do but I cannot find the stripey one so I got both colors. When I began to assemble it I realize the color sucked and it looked so plain and sad. Maybe I should have gotten a colorful fabric.
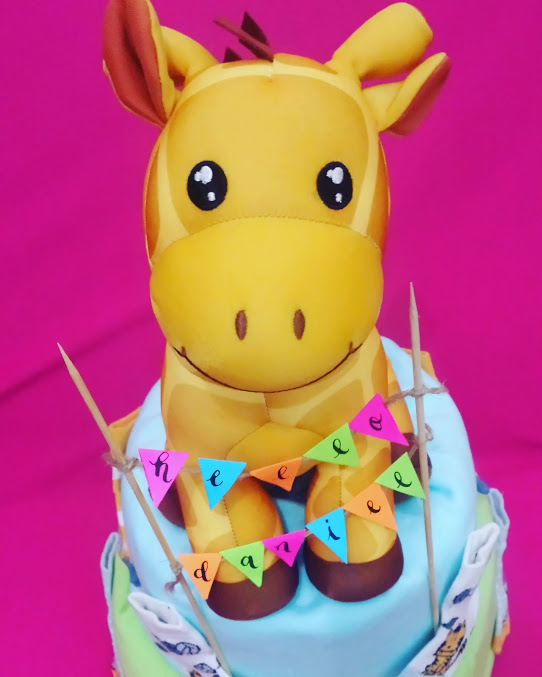
Initially I was only to do the banner for the name so I told them I might make buntings. But when I thought of buntings I imagined it to be in a nappy cake which made me decide to incorporate it there. I never thought it would be a cute touch for the somewhat bland creation.
The reactions were really positive even if I find it a bit unkempt. Well at least for a first time it's not that bad. The couple even wanted to save it somewhere instead of unraveling the thing (Awwwwwwww).

Just like any craft this made me frustrated for a long time. At first everything was fine, me cutting the circles of the paper that's supposed to be the container of the diapers until I started wrapping it with the blue and green welcome baby wraps. The sizes was just too minimal it looked like a multi colored mango bravo cake (by Contis, the tall one) so I had to redo the top circle and adjust the bottom layer. I planned to buy more diapers so the levels would be more distinct but decided against it as that would mean I need more cover for both layers.
The bottom part I had to add a bib of the same color (I bought from the same brand) just to hide the gap that shows the diaper make shift case. Supposedly I wanted to add more materials on it but since there is not much space, I only bought 6 pairs of baby socks and a stuffed toy. I couldn't find a teddy bear small enough so I went with a giraffe instead. Much to my delight the socks I was able to get are animal related too, which made it more cohesive as a design. Here are the steps and materials I used for this project:
Materials:
Papers - I got those really colorful ones which are much sturdier than your average paper. It's not yet a board, but it's a bit thicker than a bond paper. It's the same material I used for the buntings there. You can use a cartolina but I'd rather use these so I don't need to deal with a long rolled paper.
Pins, scotch tape, masking tape - I used the pins to secure the designs; masking tape for the edge of the green layer below because their ends won't meet so I just taped it on the paper and covered with a bib; scotch tape for the paper.
Diapers / Welcome hoodies / socks / stuff toy
For the buntings - bbq stick, triangles, twinning rope, ink + pen
Directions
- Make yourself a container of two sizes (I used a bowl and a plate to make the circles). The sizes should be significantly different. I drawn the circle on two pcs of paper then taped the sides from strips of more paper about 2-3 inches. Your end result should look like a paper bowl with a flat base.
- Fill both of the container with diapers
- Envelope the entire thing with two sets of cloth you fancy. I think you can use cloth diapers, but then who would use that nowadays anyway?
- Add your decorations!
Honestly the hardest part to this is the cover up. You just need to be creative in hiding what needs to be hidden. I also discovered the pins are really effective in putting everything together.
Now that I was able to practice, I think I'm ready to make a new one! If only I can find someone to give it to...


Comments
Post a Comment